Welcome to My Blog!
Remember to smile every day!-
3D打印模型后处理
本周导师一个客户家6岁的儿子比较喜欢剑和铠甲,为此挑战了一把3D打印制造与后处理,主要是上色操作。映像中师兄之前给树上色,买过一些工具,很幸运,在济南到青岛的搬迁中它幸存了!
工具和效果展示
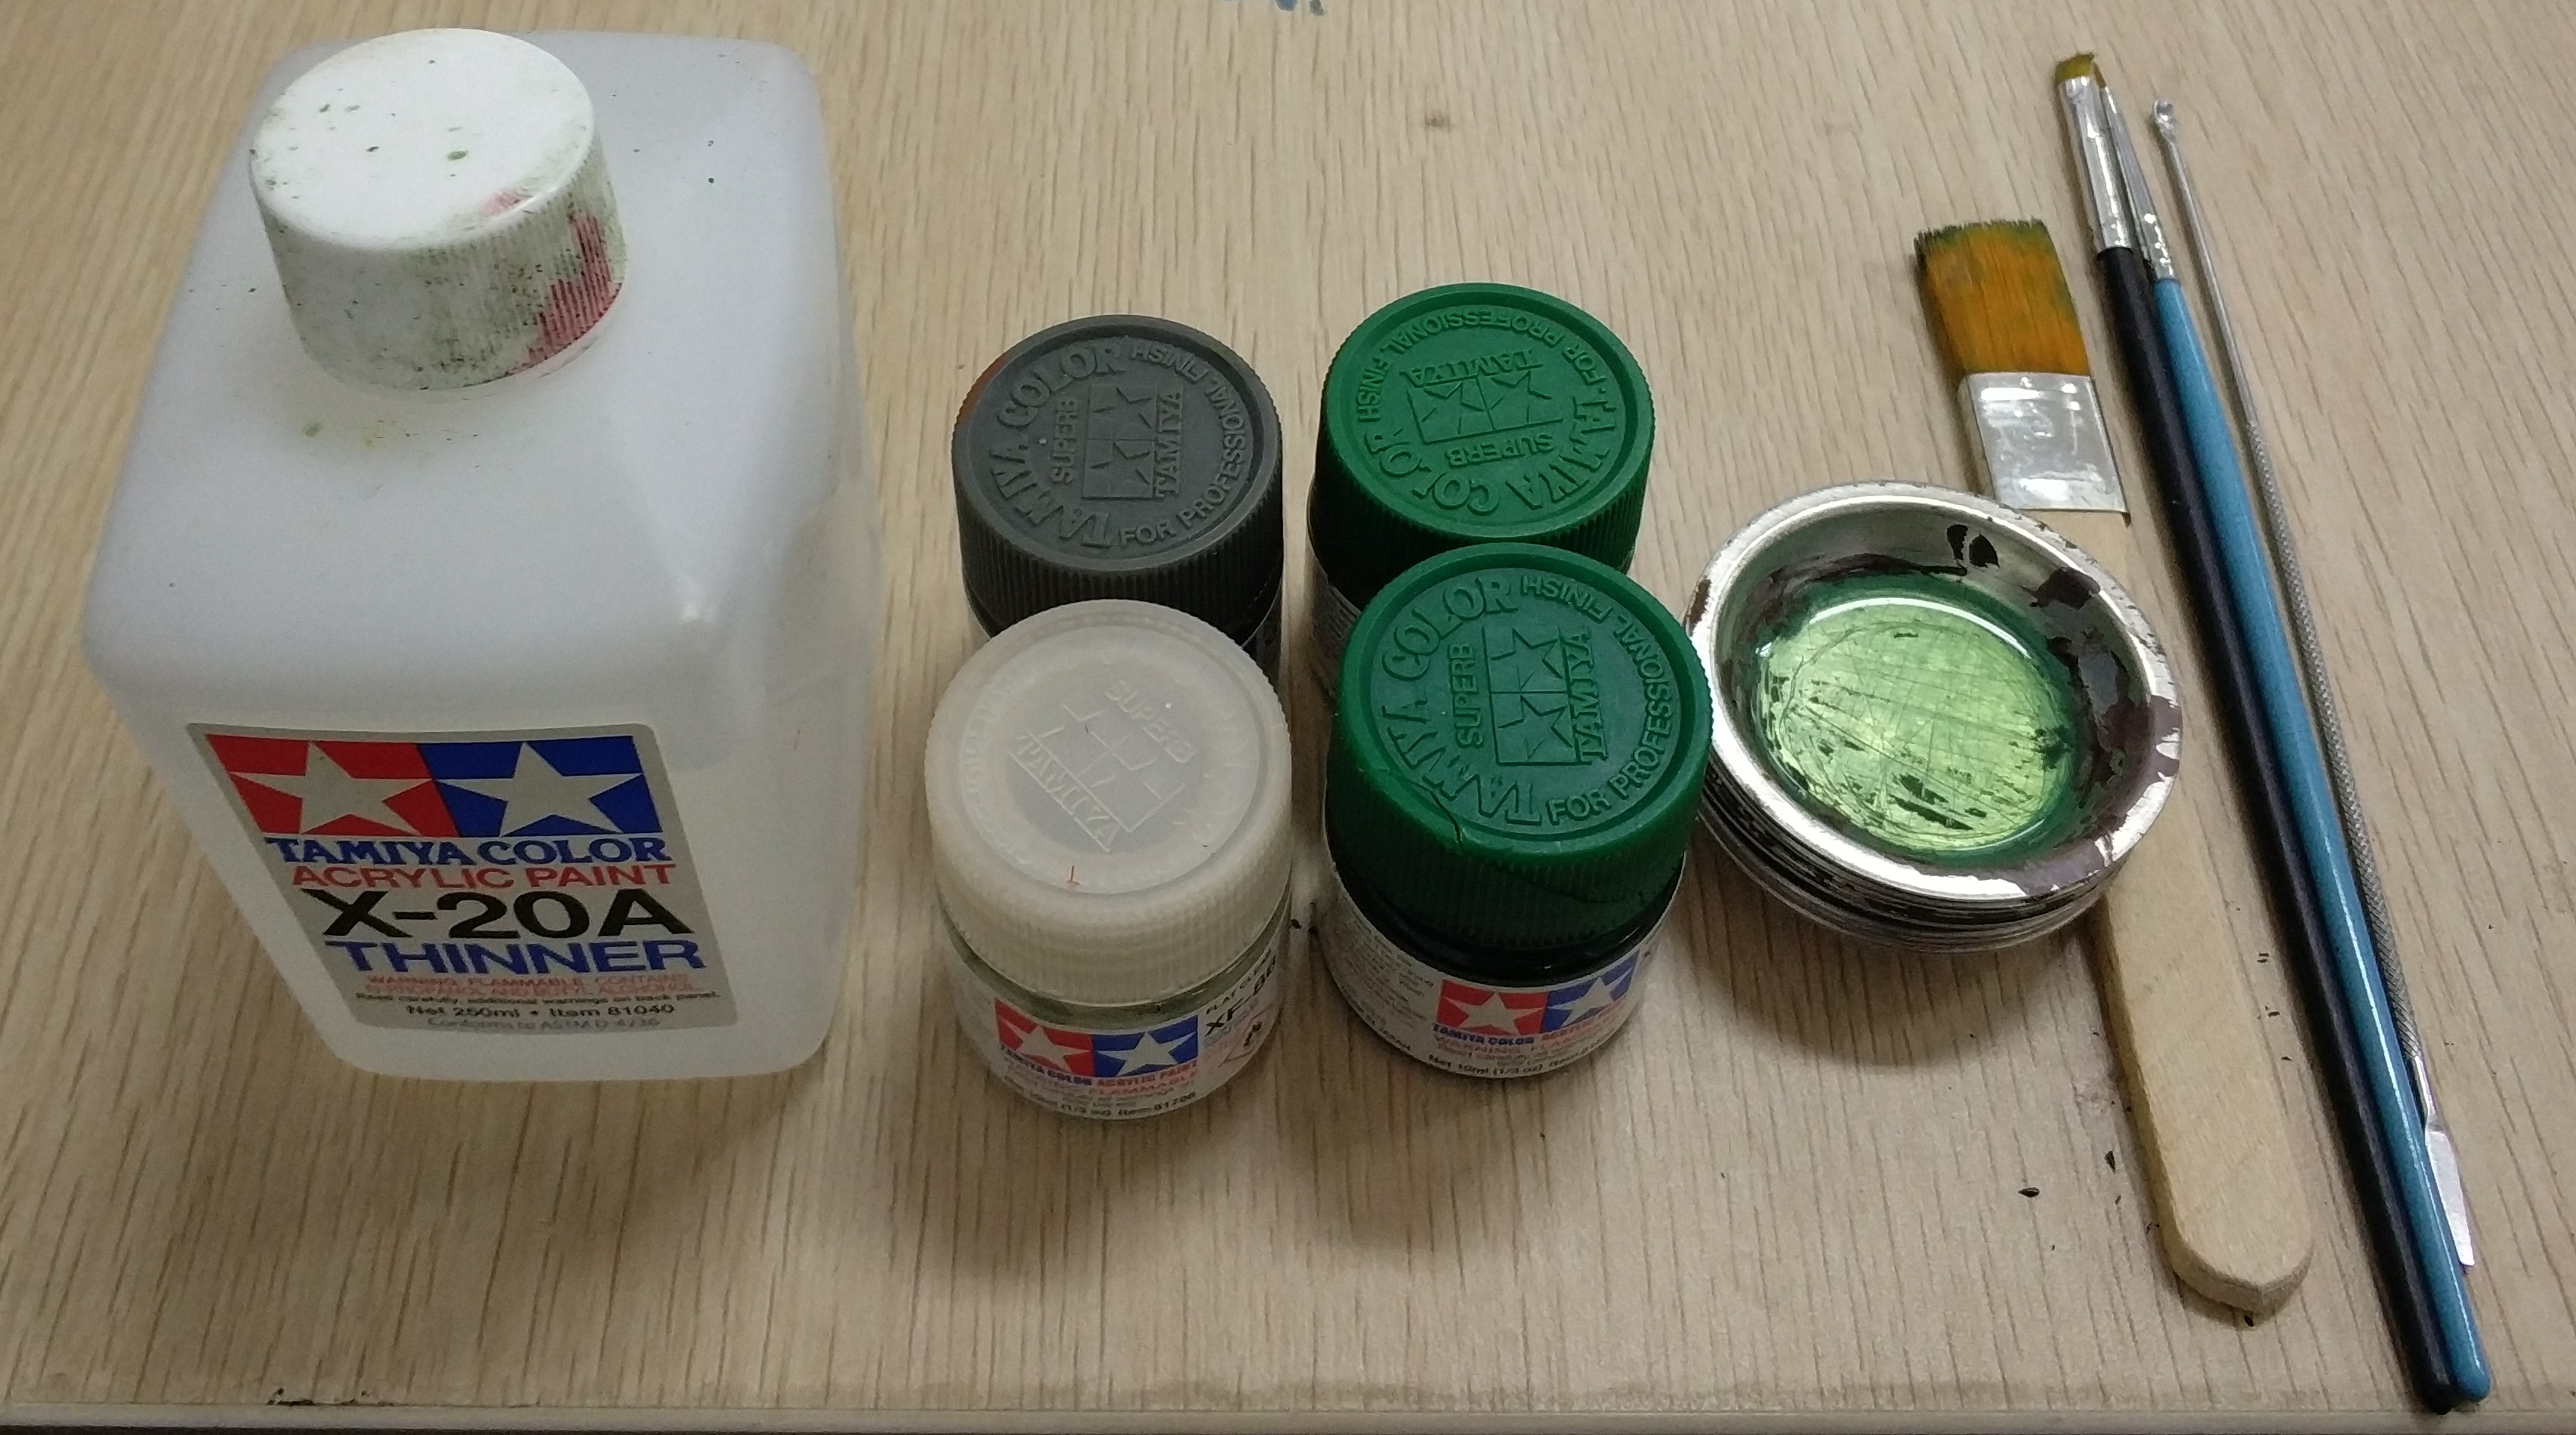
挑了一些我能用得到的工具,如下图:
 可以说我用到的工具非常简陋,有一种补充一批材料一批工具的冲动,搞点大事情!
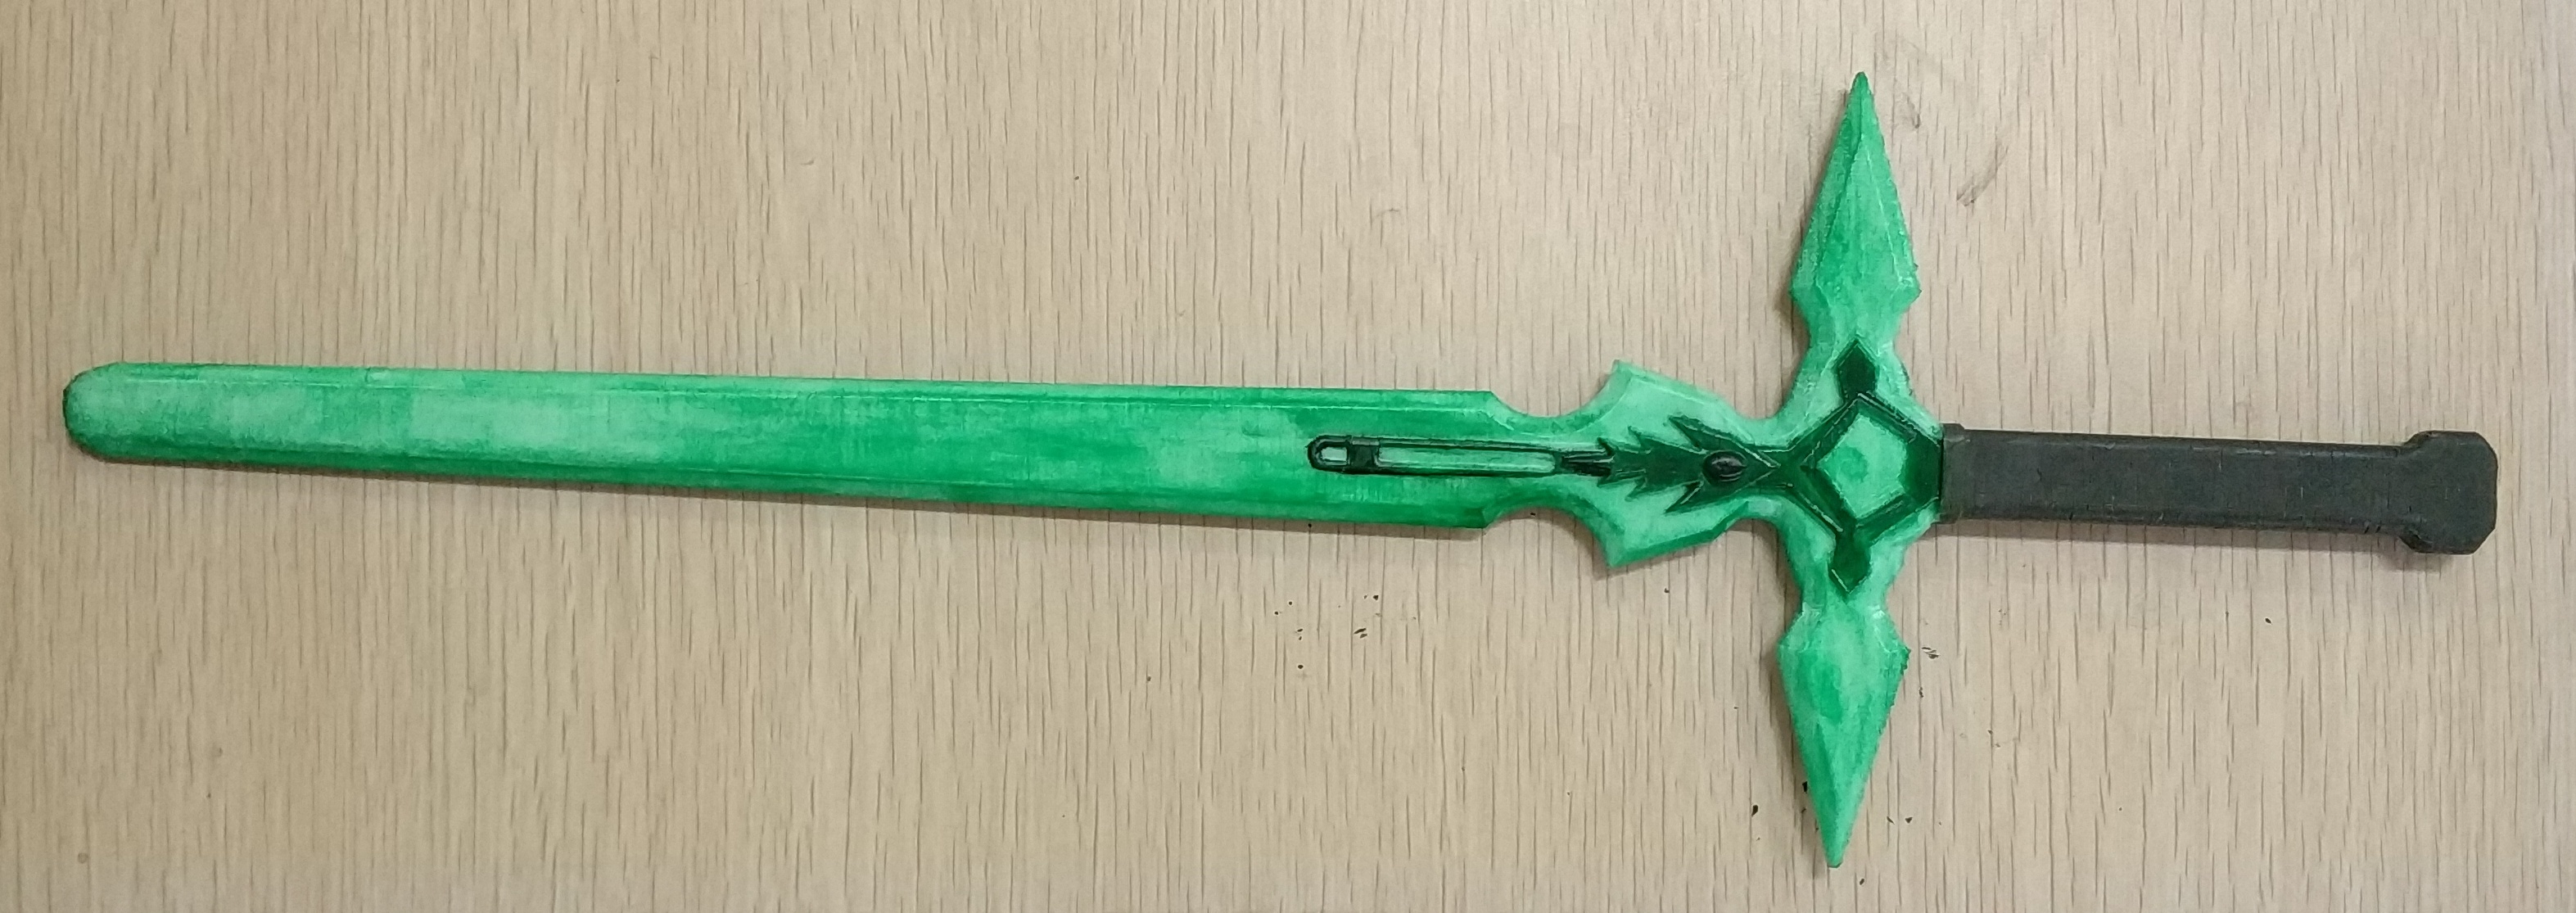
最后的效果图,感觉还行吧,现有工具情况下,我已经尽力!

3D打印模型后处理操作调研
首先我对模型后处理操作进行了调研,这个手艺主要的应用应该是手办,一个大概高20cm大小的手办,后续基本是采用人工上色,价格在5k+。
其次,采用人工上色的方法,主要步骤是打磨,上色。
打磨分为物理打磨和化学打磨两种,可以参考视频:https://www.bilibili.com/video/av12330482/index_6.html
常用的上色工具有马克笔,丙烯,田宫专用模型漆,软式粉彩和手摇式自动喷漆,可以参考视频:https://www.bilibili.com/video/av12330482/index_7.html
上色步骤和流程,可以参考视频:https://www.bilibili.com/video/av12330482/index_8.html。 视频中提到气泵和喷笔我是没有的,为此采用画笔涂,用画笔很容易造成上色不均匀,再者,白色的底漆也木有,难受了~
实践所得的一些经验,可以参考:https://www.zhihu.com/question/28919308/answer/51178453。
- 最好是先涂上一层浅色底色打底(浅灰色或白色),再涂上主色。不过为了避免表面堆积的油漆过厚换用喷笔来喷上颜色,效果会更理想。
- 平头笔刷在移动时应朝扁平面刷动。下笔时由左至右,保持手的稳定且均匀的力道移动,下笔时,笔刷和表面的角度约70度左右,轻轻的涂上,感觉上好象是让笔刷中的油漆轻松的流出在表面上,动作越轻笔痕会越不明显。
- 涂装时,应该判断什么时候再沾上油漆涂下一笔。尽量保持画笔在湿润的状态进行,含漆量保最佳湿度,才能有最均匀的笔迹。
- 一般要等第一层要干未干的情况下再加上第二层的新鲜油漆,这样比较容易消除笔触痕迹。
- 第二层的笔刷方向和第一层成为垂直直角,此称之为—十字交叉涂法。
- 手涂漆时最忌讳胡乱下笔,这种方式非常容易产生难看的笔刷痕迹,并且使油漆的厚度极不均匀,速整个表面看起来是斑斑驳驳。
- 如果碰到明显看出每笔的痕迹情形时,不要急着想要擦掉它,待其完全干燥,表面残留的油漆粒子会少点。干燥后再用一次十字交叉涂法,可把不均匀的现象降低。如果水平、垂直各涂一次后,仍呈现出颜色不均匀的现象,可以待其完全干燥后,再细水砂纸轻轻打磨掉再涂色。
实际像手办这样的精细上色步骤会更细更多一些,可以参考:http://www.sohu.com/a/102317424_254021
除了人工上色以外还有一些别的工艺,如:浸染、电镀、喷镀等,可以参考:http://www.3ddayinji.cn/how-to-color-3d-models/
给3D打印模型上色是不是一个好的科研问题???
隐约记得浙大的周昆大佬有过这方面的工作,查了一下,是SIGGRAPH 2015的。
-
Youtube的视频链接:https://www.youtube.com/watch?v=YlUhPrAqiY0
拜读大佬的工作之后,你有什么想法吗???
-
CGAL 64位配置
第二次配置了,然而感觉似乎并没有占到先前一年前配置过一次的优势,从第0步就很坎坷也是醉醉的,cgal官网都进不去……不过都用最新软件配置成功还是很开心的,为此觉得写一个教程很有必要,造福后人吧。
安装VS2015
首先是VS015的安装,迷之尴尬。下载了下图这个版本,点击vs_professional.exe,傻瓜操作,记得是自定义安装选择就好了。
安装完boost编译过了,CMake找不到编译器,特此更新了一遍就OK了,不多说(说多了都是泪啊,安装和更新都需要好久)。
下图就是相应的软件所下载和安装的位置,C盘跑起来快一些就都放这了,占着固态硬盘还有100多G也是啥都不怕了。
安装QT
接着安装64位QT,到QT官网上下载的qt-opensource-windows-x86-msvc2015_64-5.7.0.exe, 下载地址https://www.qt.io/download-open-source/#section-2。然后到微软的网站上下载了一个Qt5Package.vsix文件,下载地址:https://visualstudiogallery.msdn.microsoft.com/c89ff880-8509-47a4-a262-e4fa07168408,安装之后,在vs2015中才会有一个QT5菜项。亲身试验vs2015中Visual Studio Add-in 1.2.5 for Qt5不能使用了,并不知道为什么。安装Qt5Package.vsix后,vs2015中会有一个菜单QT5,有一个菜单荐Qt Options,点开可以add,QT的版本号和路径,可以改变或设置项目的QT版本号,还有一个QT Project Settings菜单项。配置了系统环境变量QTDIR,指向了C:\CGAL\QT\5.7\msvc2015_64,并且把C:\CGAL\Qt\5.7\msvc2015_64\bin添加到了path路径中。
安装boost
接着配置boost,boost官网是http://www.boost.org/,可以从官网上找到链接跳到https://sourceforge.net/projects/boost/files/boost/1.62.0/进行下载,我下载的是boost_1_62_0.zip。下载后解压到目录C:\CGAL\boost_1_62_0,里面有一个bootstrap.bat 文件。以管理员权限启动命令行cmd,进入到C:\CGAL\boost_1_62_0。直接运行bootstrap.bat。然后C:\CGAL\boost_1_62_0目录中,会生成b2.exe和bjam.exe, 如果直接运行b2.exe或者bjam.exe会生成根据操作系统上默认的编译器编译出boost的相关的库,应该是32位的吧。而我需要64位的,用于vs2015的,我就在命令行中接着运行bjam.exe address-model=64,其中 address-model=64保证编译的是64位的库。如果要指定编译器,比如系统上同时安装有vs2012和vs2015,想用vs2015编译库,可运行bjam.exe –toolset=msvc-14.0,如果需要编译64位的话,运行bjam.exe –toolset=msvc-14.0 address-model=64。其中参数–toolset=msvc-14.0指定使用vs2015对应的编译器,vs2013是msvc-12.0,vs2012是msvc-11.0 。这样就编译好了,生成stage/lib目录,lib目录中就是编译好的库。还需要配置环境变量,添加系统环境变量BOOST_ROOT,指向bootstrap.bat所在的目录,我的为C:\CGAL\boost_1_62_0,添加系统环境变量BOOST_LIBRARYDIR,我的为C:\CGAL\boost_1_62_0\stage\lib。
安装CMake
然后安装CMake,下载地址是https://cmake.org/download/,我选择了cmake-3.7.0-rc2-win64-x64.msi,开始傻瓜操作了,注意第二步选择按下图就好了。安装完毕后确认一下系统环境变量path中有没有C:\CGAL\CMake\bin,若没有需要手动添加进去。
安装CGAL
接着配置CGAL,CGAL的官网站是http://www.cgal.org/download/windows.html,其中有链接跳转到https://github.com/CGAL/cgal/releases,进行下载,我下载的是CGAL-4.9-Setup.exe文件,双击会让选择32bit还是64bit,我要64位的所以选择了64bit的进行安装(实际上是解压),我使用它的默认解压路径,解压到了C:\CGAL\CGAL。建议安装在C盘,安装时注意按下图选择相关选项,其他默认就好。
安装完成后保证C:\CGAL\CGAL\auxiliary\gmp\lib在系统环境变量Path中,并添加环境变量CGAL_DIR,我的为C:\CGAL\CGAL。
安装libQGLViewer
接着安装libQGLViewer,下载地址是http://libqglviewer.com/installWindows.html,我选择的是libQGLViewer-2.6.4.zip。这个只有需要用CGAL的3D功能时才要装,只用2D的话可以跳过。或者可以用libQGLViewer作为QT creator的 3d绘图窗口插件。这个主要是参考官网http://libqglviewer.com/installWindows.html弄的。官网方法有很多种,我是用qt creator 直接编译的,打开C:\CGAL\libQGLViewer-2.6.4\QGLViewer里的 QGLViewer.pro 直接编译,应该就出来QGLViewer2.dll、QGLViewer2.lib(release版)和 QGLViewerd2.dll、QGLViewerd2.lib(debug版)了,将dll拷贝至系统文件夹 32位是C:\Windows\System32,64位是C:\Windows\SysWOW64,两个都拷贝一下也成。为qt creator安装designer plugin, 打开C:\CGAL\libQGLViewer-2.6.4\designerPlugin 下的 designerPlugin.pro 直接编译 将生成的qglviewerplugin.dll拷贝至QT目录下C:\CGAL\QT\5.7\msvc2015_64\plugins\designer,再将QGLViewer2.dll拷贝至C:\CGAL\QT\5.7\msvc2015_64\bin。然后配置了环境变量QGLVIEWERROOT,指向了C:\CGAL\libQGLViewer-2.6.4,并且把C:\CGAL\libQGLViewer-2.6.4\QGLViewer添加到了path路径中。
CMake配置和运行
最后,用Cmake配置CGAL库,打开CMAKE,“Where is the source code:”栏目填CGAL的解压路径,我的是C:\CGAL\CGAL。”Where to build the binaries”栏目填要把build库等文件放在的目录,我填的是C:\CGAL\CGA\build。然后,点Configure按钮,我没遇到错误,会弹出编译器选择话框,我选的是vs2015 64位的,然后点Generate,会在C:\CGAL\CGAL\build目录下生成CGAL.sln文件。我双击用vs2015打开CGAL.sln,分别在Debug和Release模式下,点“生成”菜单下的“生成解决方案”,编译出对应的库在C:\CGAL\CGAL-4.8.1\build\lib目录下,此时需要将C:\CGAL\CGAL\build\bin添加到了path路径中。
哈哈哈,如果顺利的话你就可以按最后一步类推运行cgal里面的demo了,希望每个新手都配置顺利,Enjoy it~~~~
-
3D QR Code
A project about generating a fabricatable 3D QR Code on arbitrary surfaces.
Our Goal
QR code is a machine-readable barcode that has been extensively used to encode information. A common QR code in our daily life mainly exists in the screen or printed publications. While, QR codes on paper are not durable and easily forged. Besides, QR codes expressed on arbitrary curved surface has a low recognition rate. To address these problems, we propose an approach to fabricate 3D QR codes on arbitrary surface based on self shadowing.
Our Method
First, we simulate the 3D QR code by ambient occlusion and physical experiment calibration. Then, we map the QR code image to the target area of the custom 3D model by perspective projection transformation, and we apply a curve operation with uniform depth. Finally, we iteratively optimize the depth to generate readable 3D QR codes on arbitrary surface. We demonstrate that our approach produces high quality 3D QR code on arbitrary surface which can be made from a single attribute material using a desktop 3D printer.
Compile
Compile this project using the standard cmake routine:
mkdir build
cd build
cmake ..
make
Run
From within the
builddirectory just issue:./3D_Qrcode_binTittle-tattle
Dose tittle-tattle really help attract more friends? This project is the major part in my first year of graduate school. I did a lot of preparatory work in the previous period, such as: physics experiments, related work surveys. In addition, I wrote two patents, one paper which have not published(a little sad). Thanks to the help of my boyfriend, this project has a better ending. Through the training of this project, I have a certain understanding of scientific research. It is fun but hard, you need to invest a lot of time and energy. Finally, wish all researchers a lot of papers!!!
hhhhhh……
-
QR Optimization
A project about QR Optimization for easily generating a 3D QR Code later.
Our Goal
Increase the overall contrast by optimizing the distribution of black modules without violating readability.
Our Intuition
An isolated module gives higher contrast than one with black neighborhoods.
Compile
Compile this project using the standard cmake routine:
mkdir build
cd build
cmake ..
make
Run
From within the
builddirectory just issue:./example_binAlgorithm
1 Find all connected black non-functional components CC
2 Calculate the visibilit of each CC and push them into PQ in an ascending order;
3 While (PQ not empty) {
	1.Popup CC from PQ;
	2.If CC can be dispersed,
		  flip one module;
		  Continue;
	  Else
		  goto step 3.1;
	4 Find all connected black non-functional components CC
	5 Calculate the visibility of each CC and push them into PQ;
  }
4 Return the current QR
You should clearly understand the coding ruls of QR Code first, otherwise, you can not know which CC can be dispersed.
Results
You can see some results in
resultsdirectory.
-
Google Test
Example-google-test is a simaple project aimd to help to quick build a google unit test project. It is managed by Cmake and can be easy used in windows platform. Thanks for Crascit repo, we can download and configure google-test easily.
Add your project
Fix
../cmake/FindExt.cmaketo add your project include dir and libraries# - Try to find the EXT_LIB libraries # Once done this will define # # EXT_LIB - system has EXT_LIB # EXT_LIB - **the** EXT_LIB include directory # EXT_LIB - EXT_LIB include directories # EXT_LIB - the EXT source files if(NOT QR_LIB_FOUND) FIND_PATH(EXT_SOURCE_DIR ${PROJECT_SOURCE_DIR}/../../ XXX # Your project path ${PROJECT_SOURCE_DIR}/../XXX # Your project path ${PROJECT_SOURCE_DIR}/XXX # Your project path # you can add project path yourself on here /usr/include /usr/local/include ) if(EXT_SOURCE_DIR) set(EXT_LIB_FOUND TRUE) set(EXT_INCLUDE_DIRS ${EXT_SOURCE_DIR}/# your include directories ) set(EXT_LIBRARIES ${EXT_SOURCE_DIR}/# your libiraries) endif() endif()Compile
Compile this project using the standard cmake routine:
mkdir build
cd build
cmake ..
make
This should find and build the dependencies and create a exampleTest binary.
Dependencies
If you create your project at
/path/to/your project/,then a good place to clone this library is /path/to/example-google-test/.
-
GitBook使用
试图回想一周前刷的题,好像有些忘了。一个个在网站上找出来回忆需要点击很多次,可谓非常麻烦。之前是有一些笔记的,但总觉得不够系统不够清晰,发现gitbook这样好用的东西,就想试试。
效果: https://lorrain.gitbooks.io/gitbook-point_to_offer-solutions/content/
Github:https://github.com/lorrain0407/gitbook-point_to_offer-solutions


